SwiftUI essentials
Building lists and navigation
With the basic landmark detail view set up, you need to provide a way for users to see the full list of landmarks, and to view the details about each location.
You’ll create views that can show information about any landmark, and dynamically generate a scrolling list that a user can tap to see a detail view for a landmark. To fine-tune the UI, you’ll use Xcode to render previews at different device sizes.
Download the project files to begin building this project, and follow the steps below.
Section 1
Create a new project and explore the canvas
Create a new Xcode project that uses SwiftUI. Explore the canvas, previews, and the SwiftUI template code.
To preview and interact with views from the canvas in Xcode, and to use all the latest features described throughout the tutorials, ensure your Mac is running macOS Sonoma or later.
Step 1
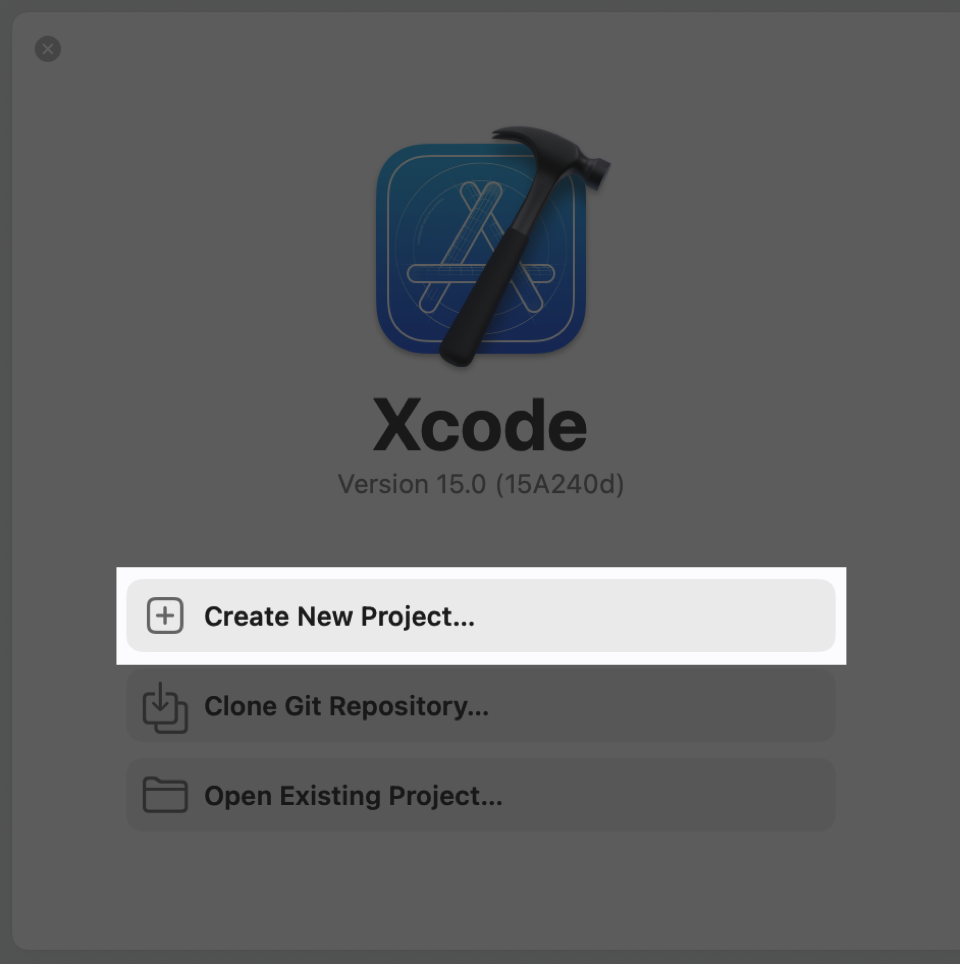
Open Xcode and either click “Create New Project” in Xcode’s startup window, or choose File > New > Project.
Step 2
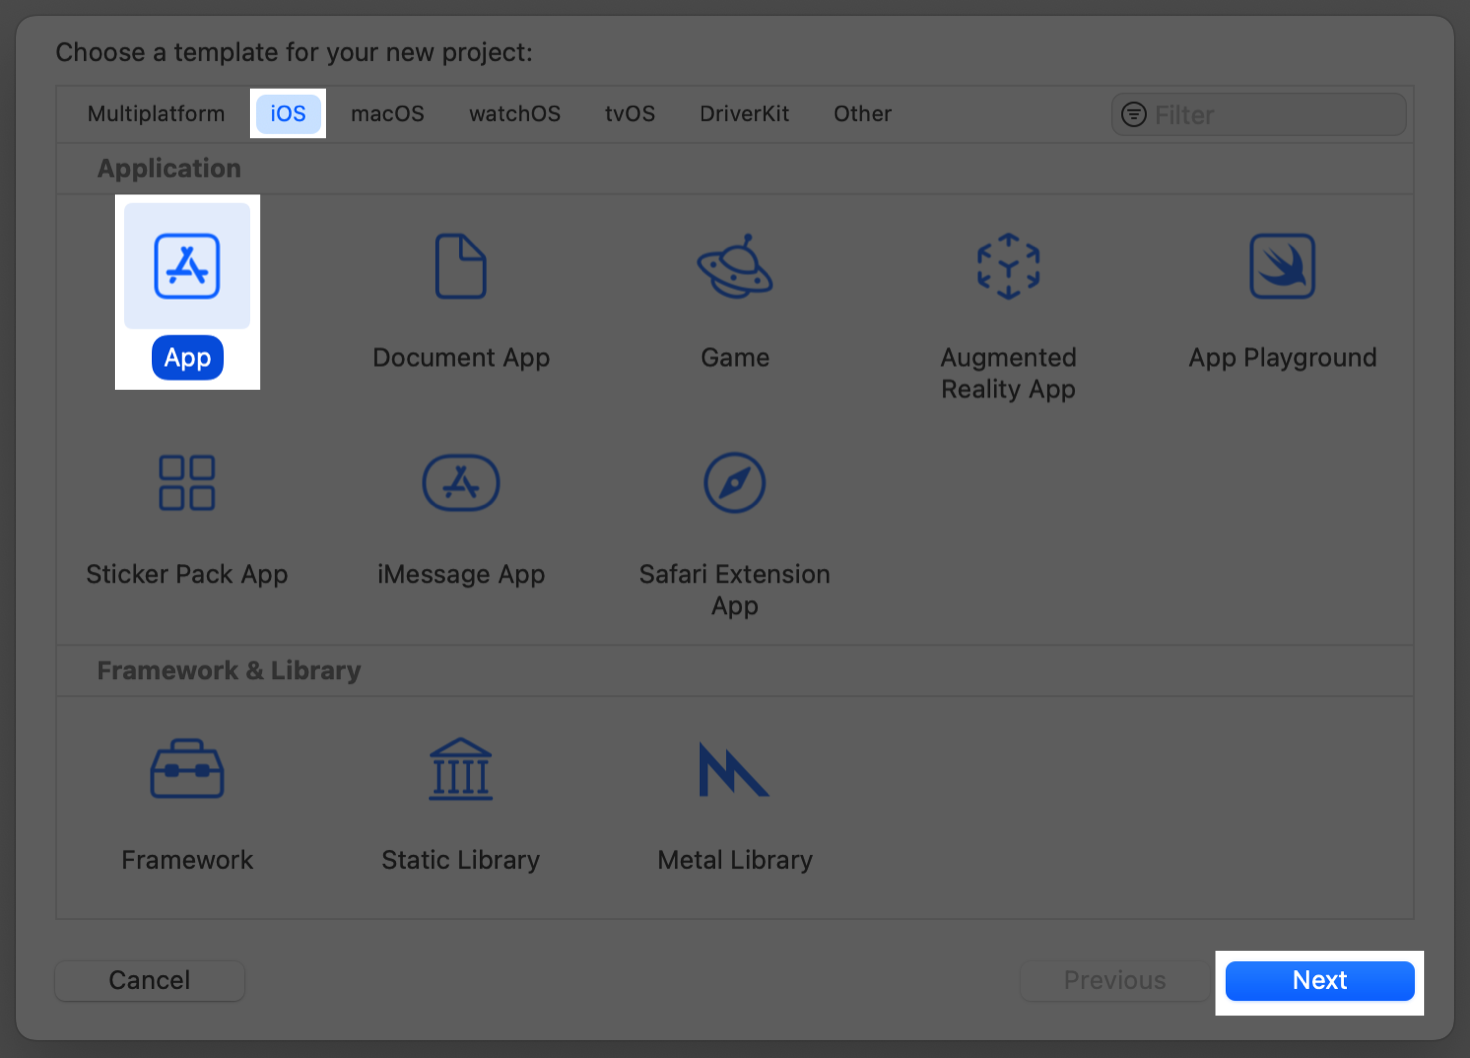
In the template selector, select iOS as the platform, select the App template, and then click Next.
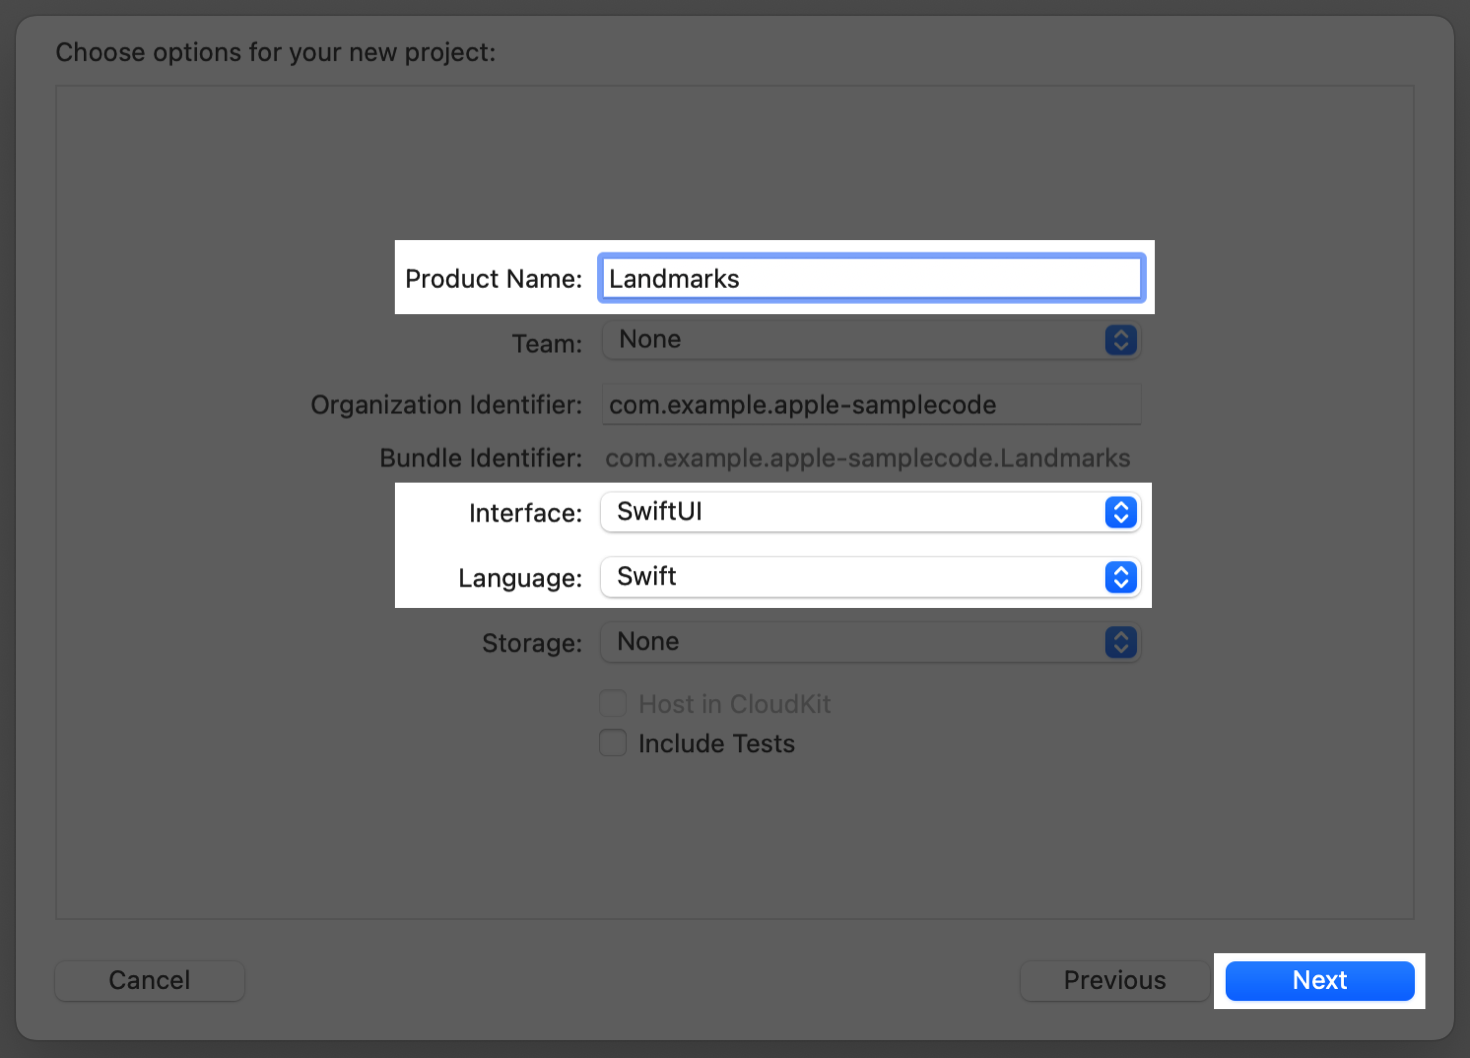
Step 3
Enter “Landmarks” as the product name, select “SwiftUI” for the interface and “Swift” for the language, and click Next. Choose a location to save the Landmarks project on your Mac.
Step 4
In the Project navigator, select LandmarksApp.
An app that uses the SwiftUI app life cycle has a structure that conforms to the App protocol. The structure’s body property returns one or more scenes, which in turn provide content for display. The @main attribute identifies the app’s entry point.
1import SwiftUI23@main4struct LandmarksApp: App {5var body: some Scene {6WindowGroup {7ContentView()8}9}10}
Step 5
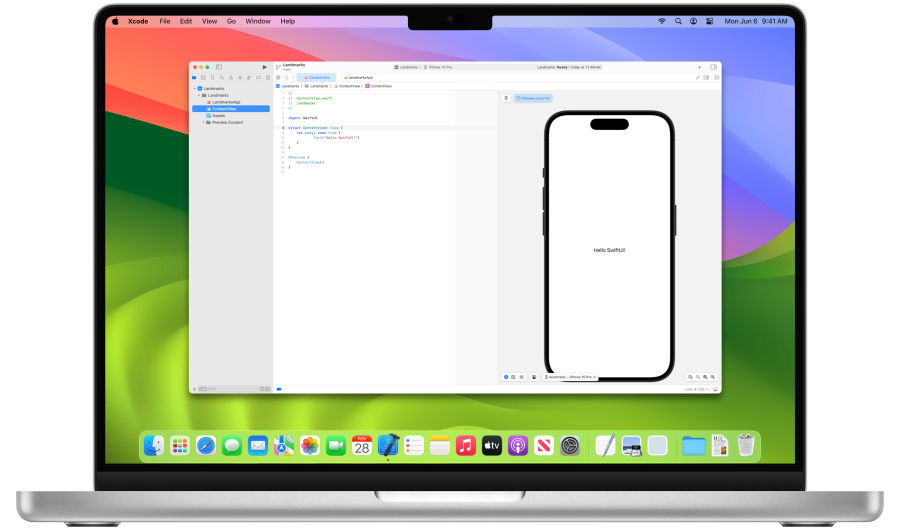
In the Project navigator, select ContentView.
By default, SwiftUI view files declare a structure and a preview. The structure conforms to the View protocol and describes the view’s content and layout. The preview declaration creates a preview for that view.
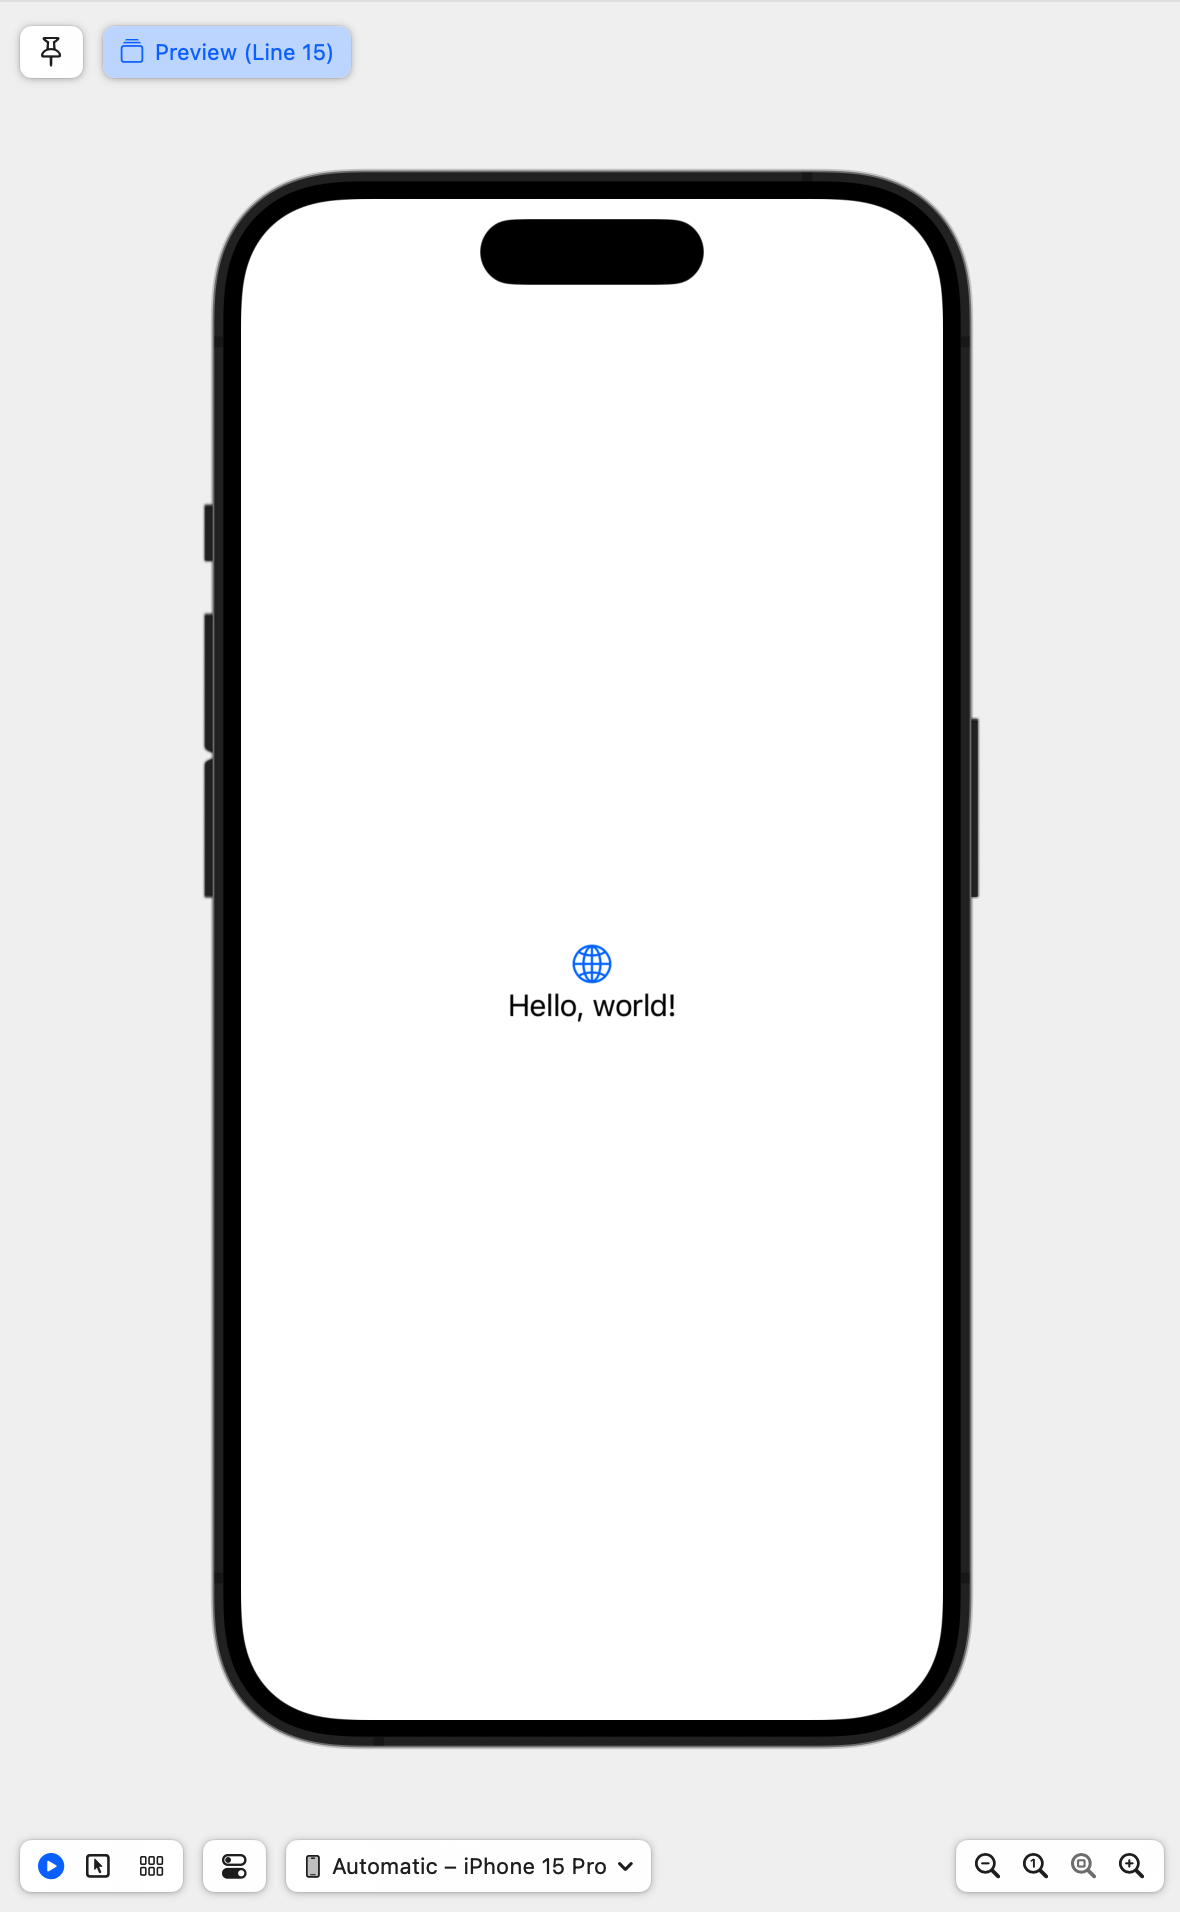
1import SwiftUI23struct ContentView: View {4var body: some View {5VStack {6Image(systemName: "globe")7.imageScale(.large)8.foregroundStyle(.tint)9Text("Hello, world!")10}11.padding()12}13}1415#Preview {16ContentView()17}

Step 6
The canvas displays a preview automatically.
If the canvas isn’t visible, select Editor > Canvas to show it.
Step 7
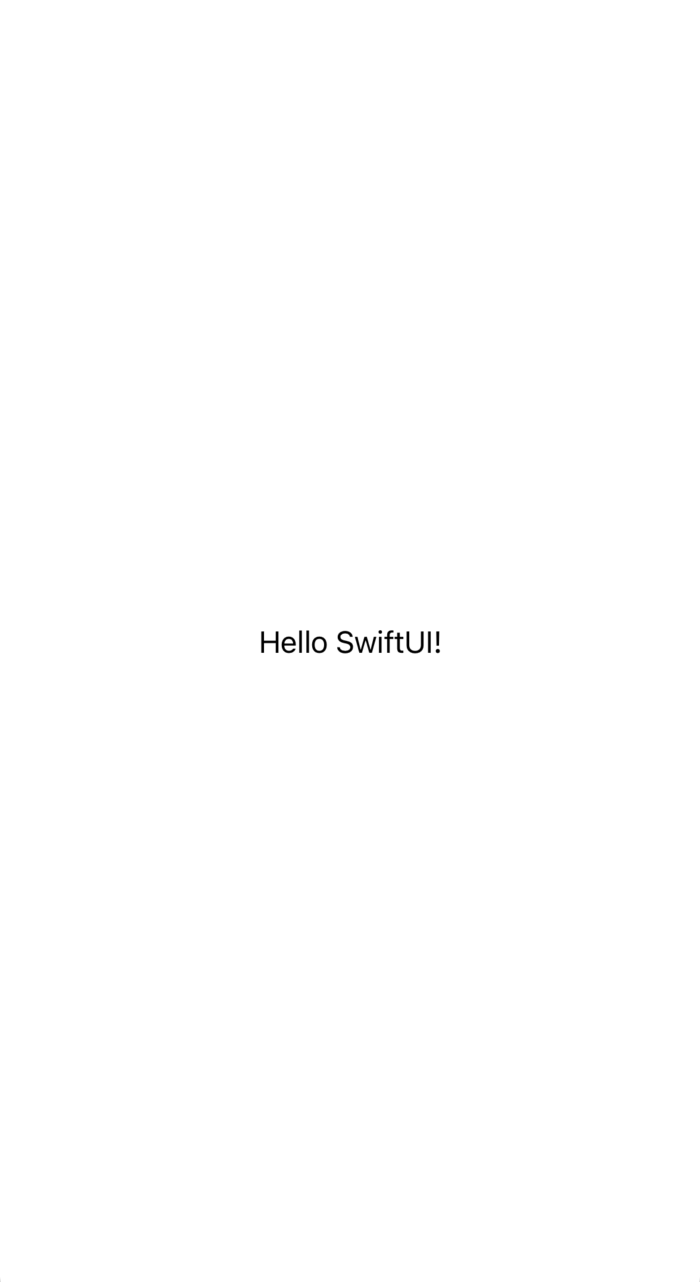
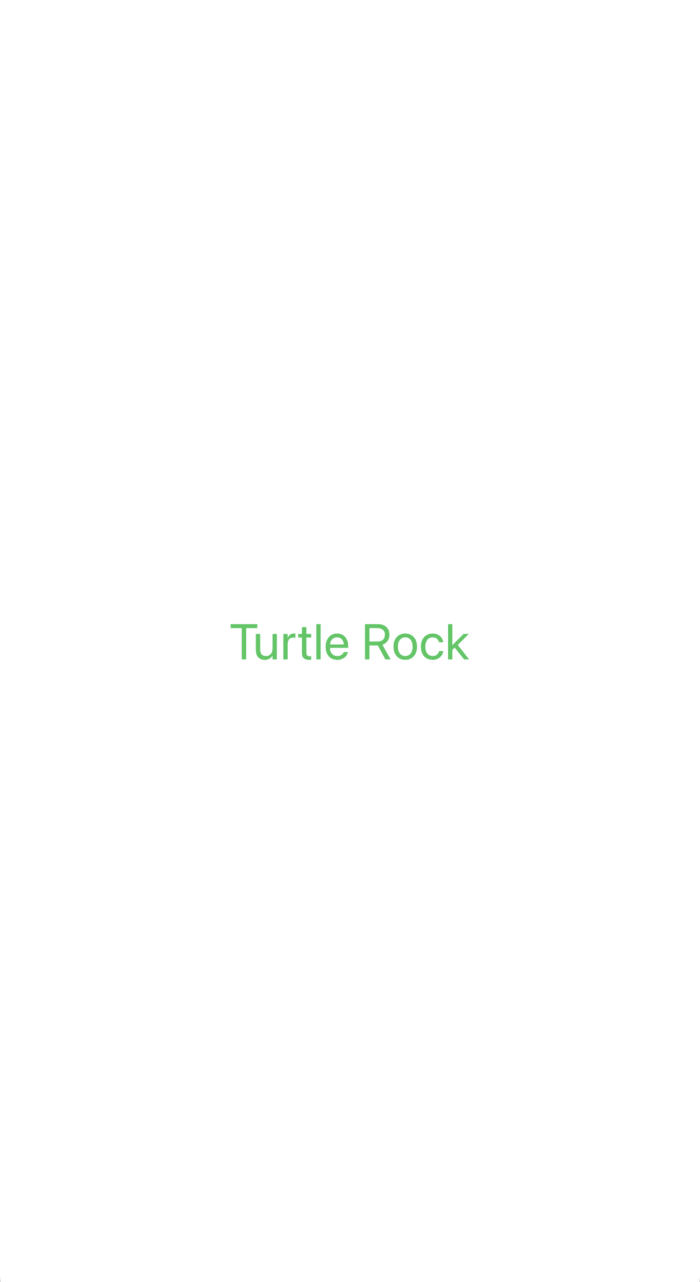
Inside the body property, remove everything but the Text declaration and change “Hello, world!” to a greeting for yourself.
As you change the code in a view’s body property, the preview updates to reflect your changes.
1import SwiftUI23struct ContentView: View {4var body: some View {5Text("Hello SwiftUI!")6}7}89#Preview {10ContentView()11}
Section 2
Customize the text view
You can customize a view’s display by changing your code, or by using the inspector to discover what’s available and to help you write code.
As you build the Landmarks app, you can use any combination of editors: the source editor, the canvas, or the inspectors. Your code stays updated, regardless of which tool you use.
Next, you’ll customize the text view using the inspector.
Step 1
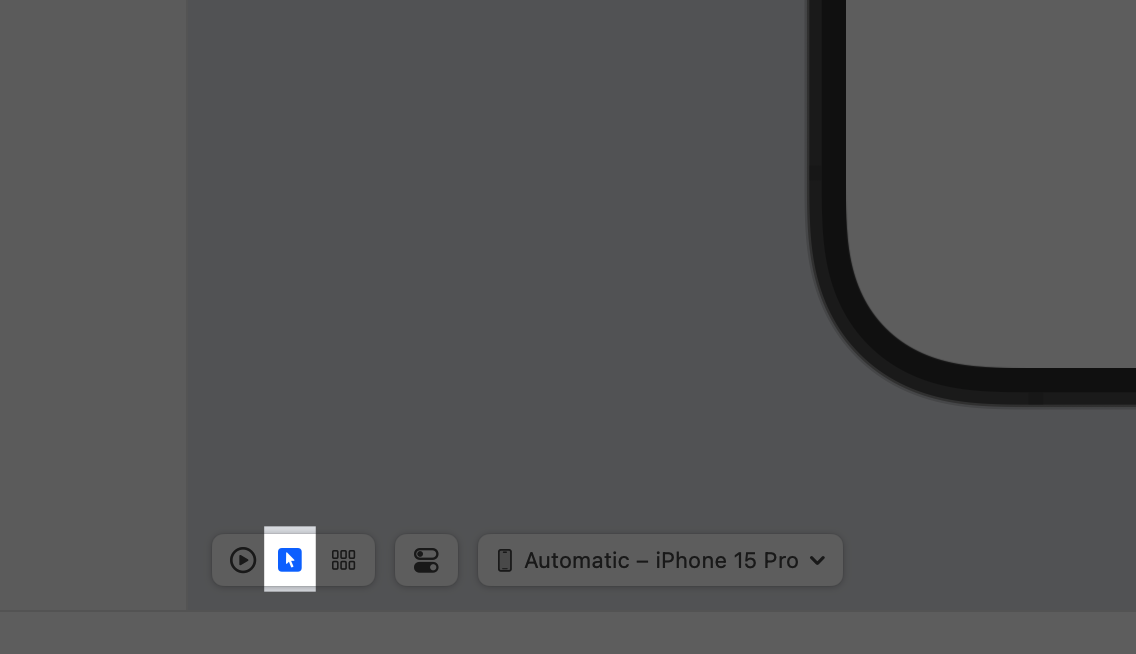
Change the canvas mode to Selectable.
The canvas displays previews in Live mode by default so that you can interact with them, but you can use the Selectable mode to enable editing instead.
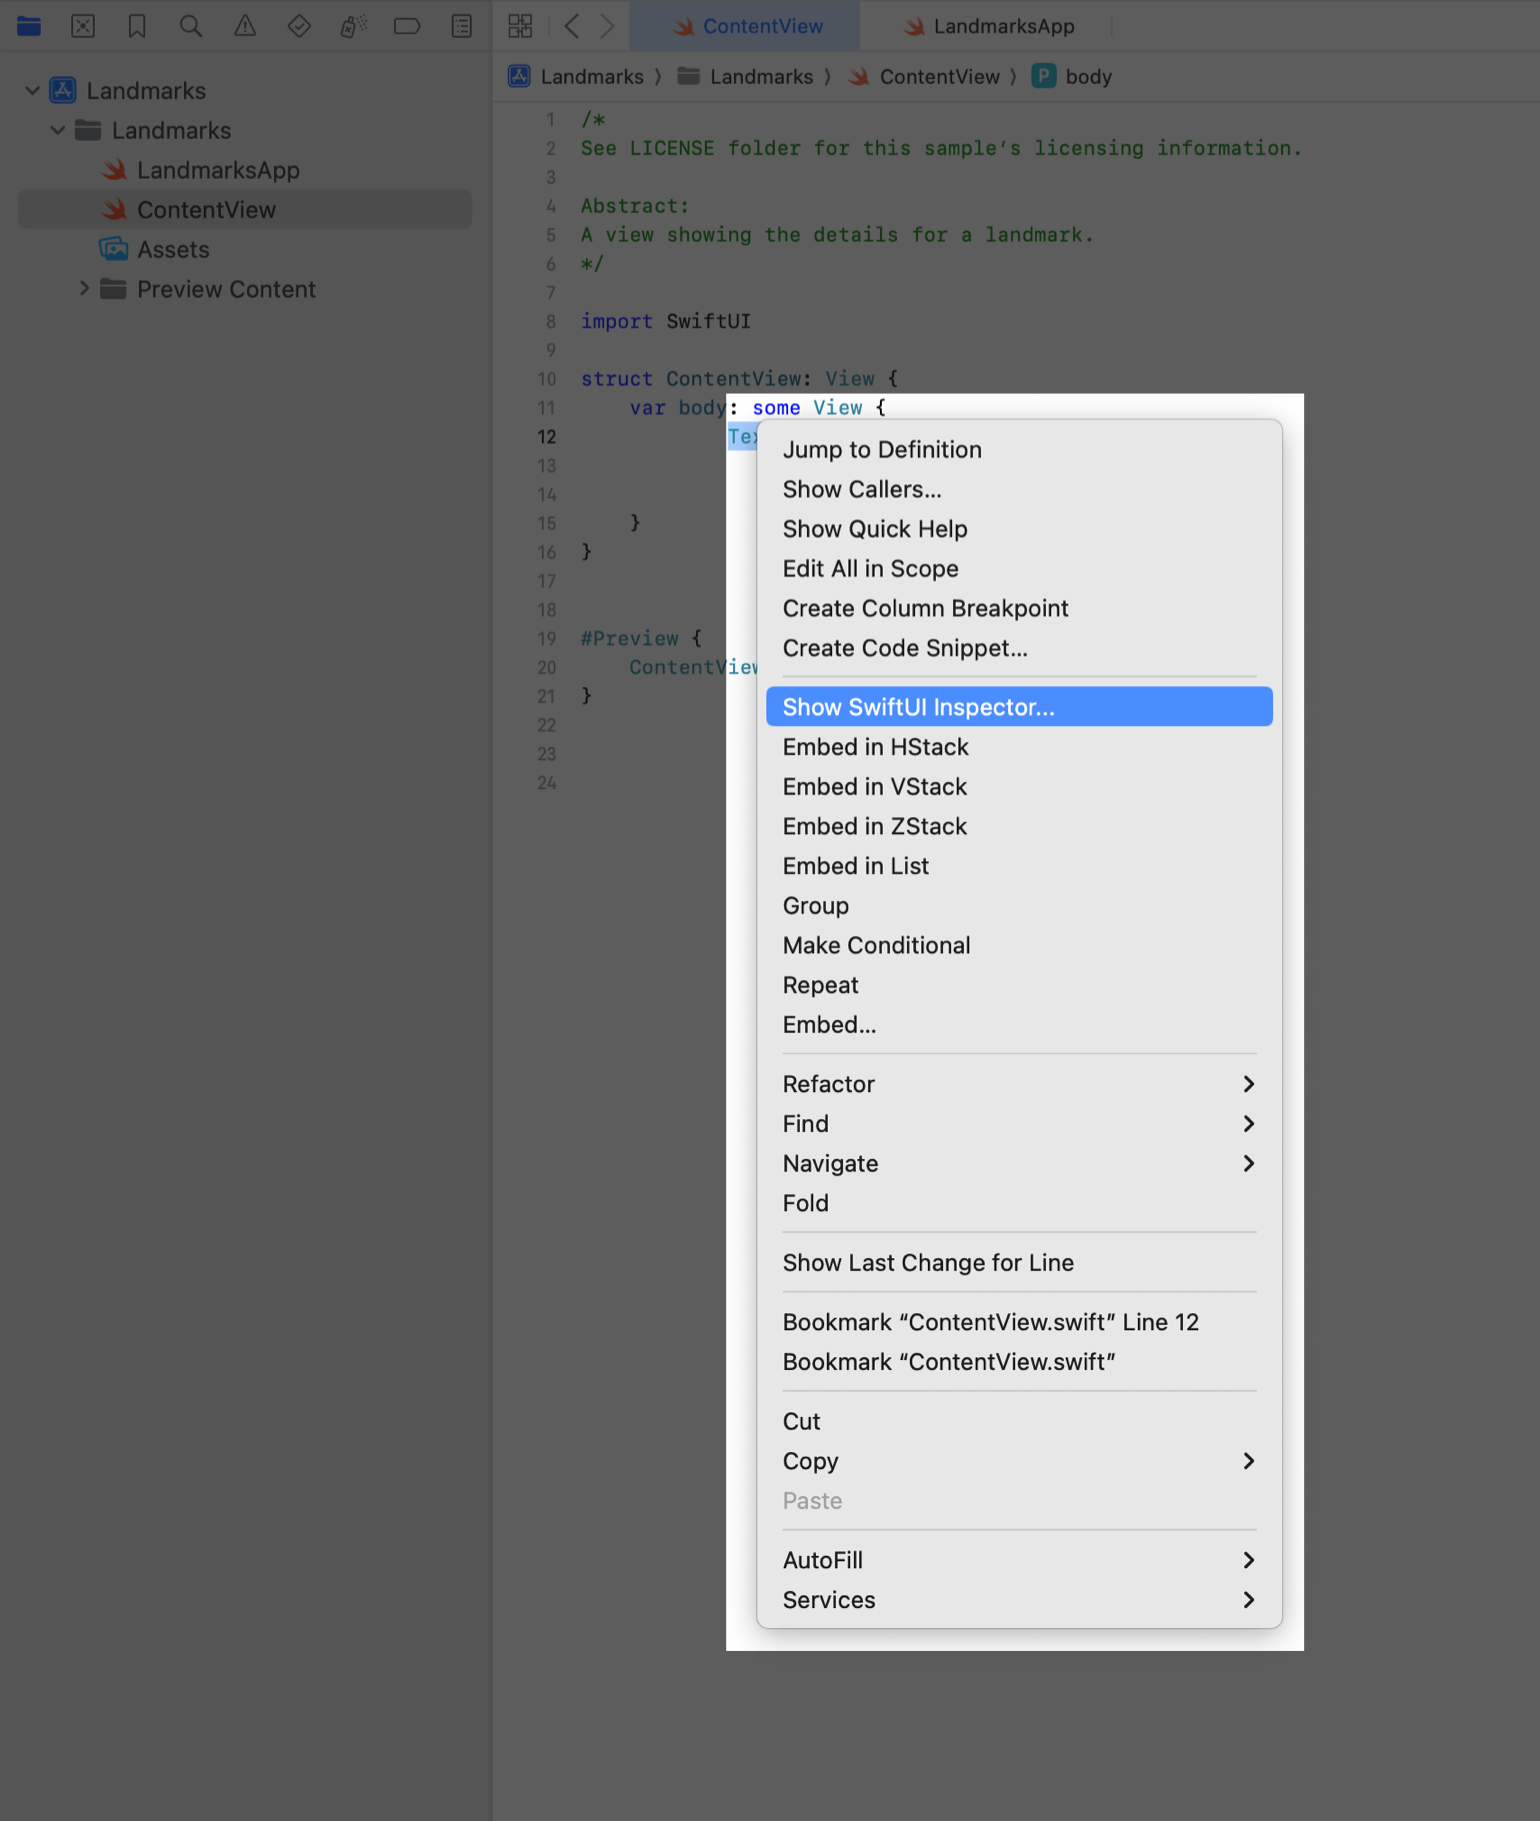
Step 2
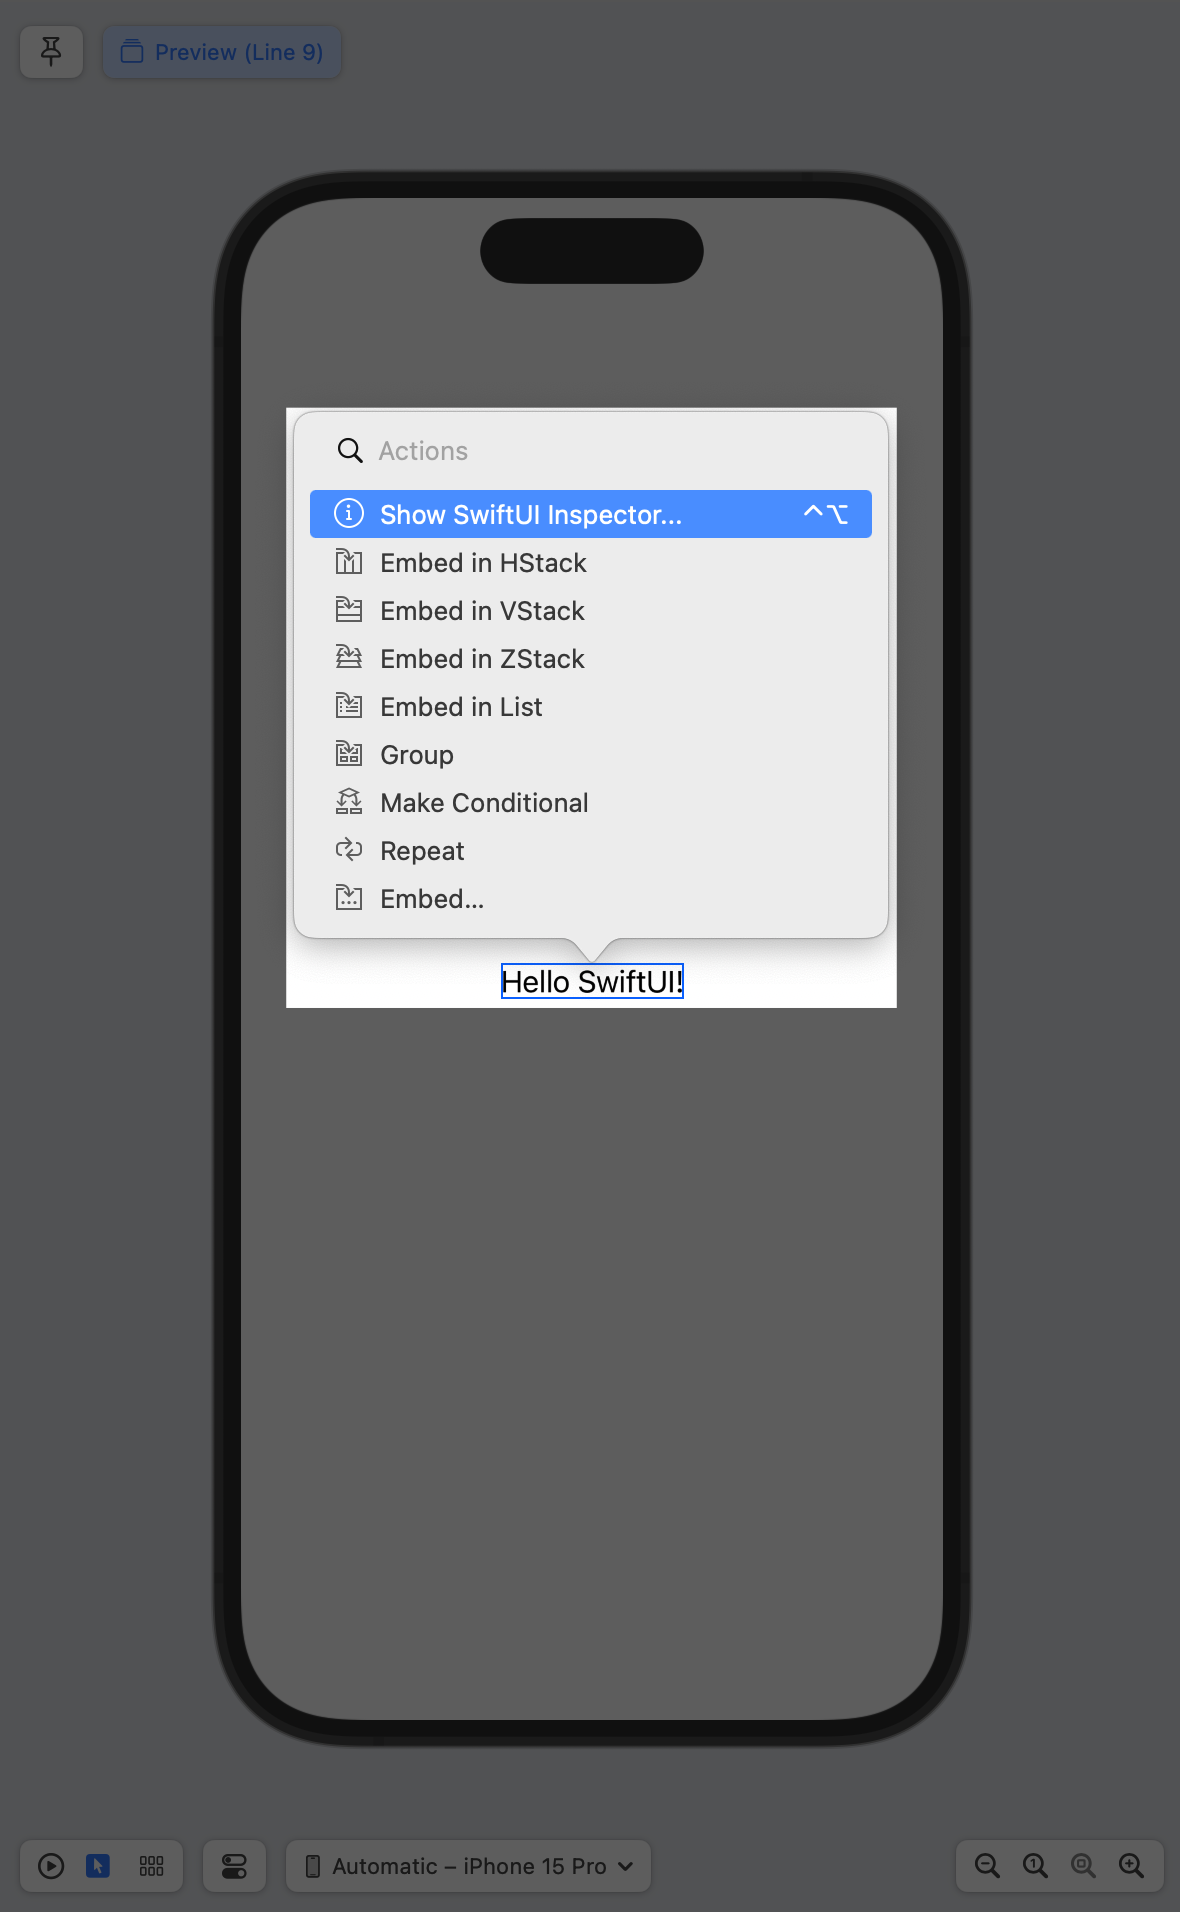
In the preview, Command-Control-click the greeting to bring up the structured editing popover, and choose “Show SwiftUI Inspector”.
The popover shows different attributes that you can customize, depending on the type of view you inspect.
Step 3
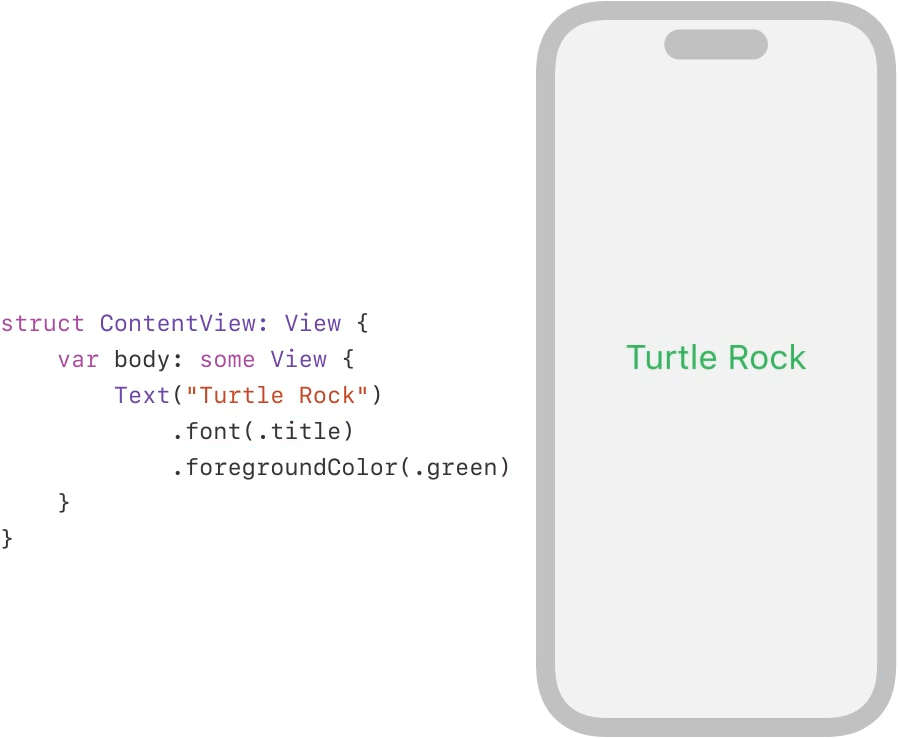
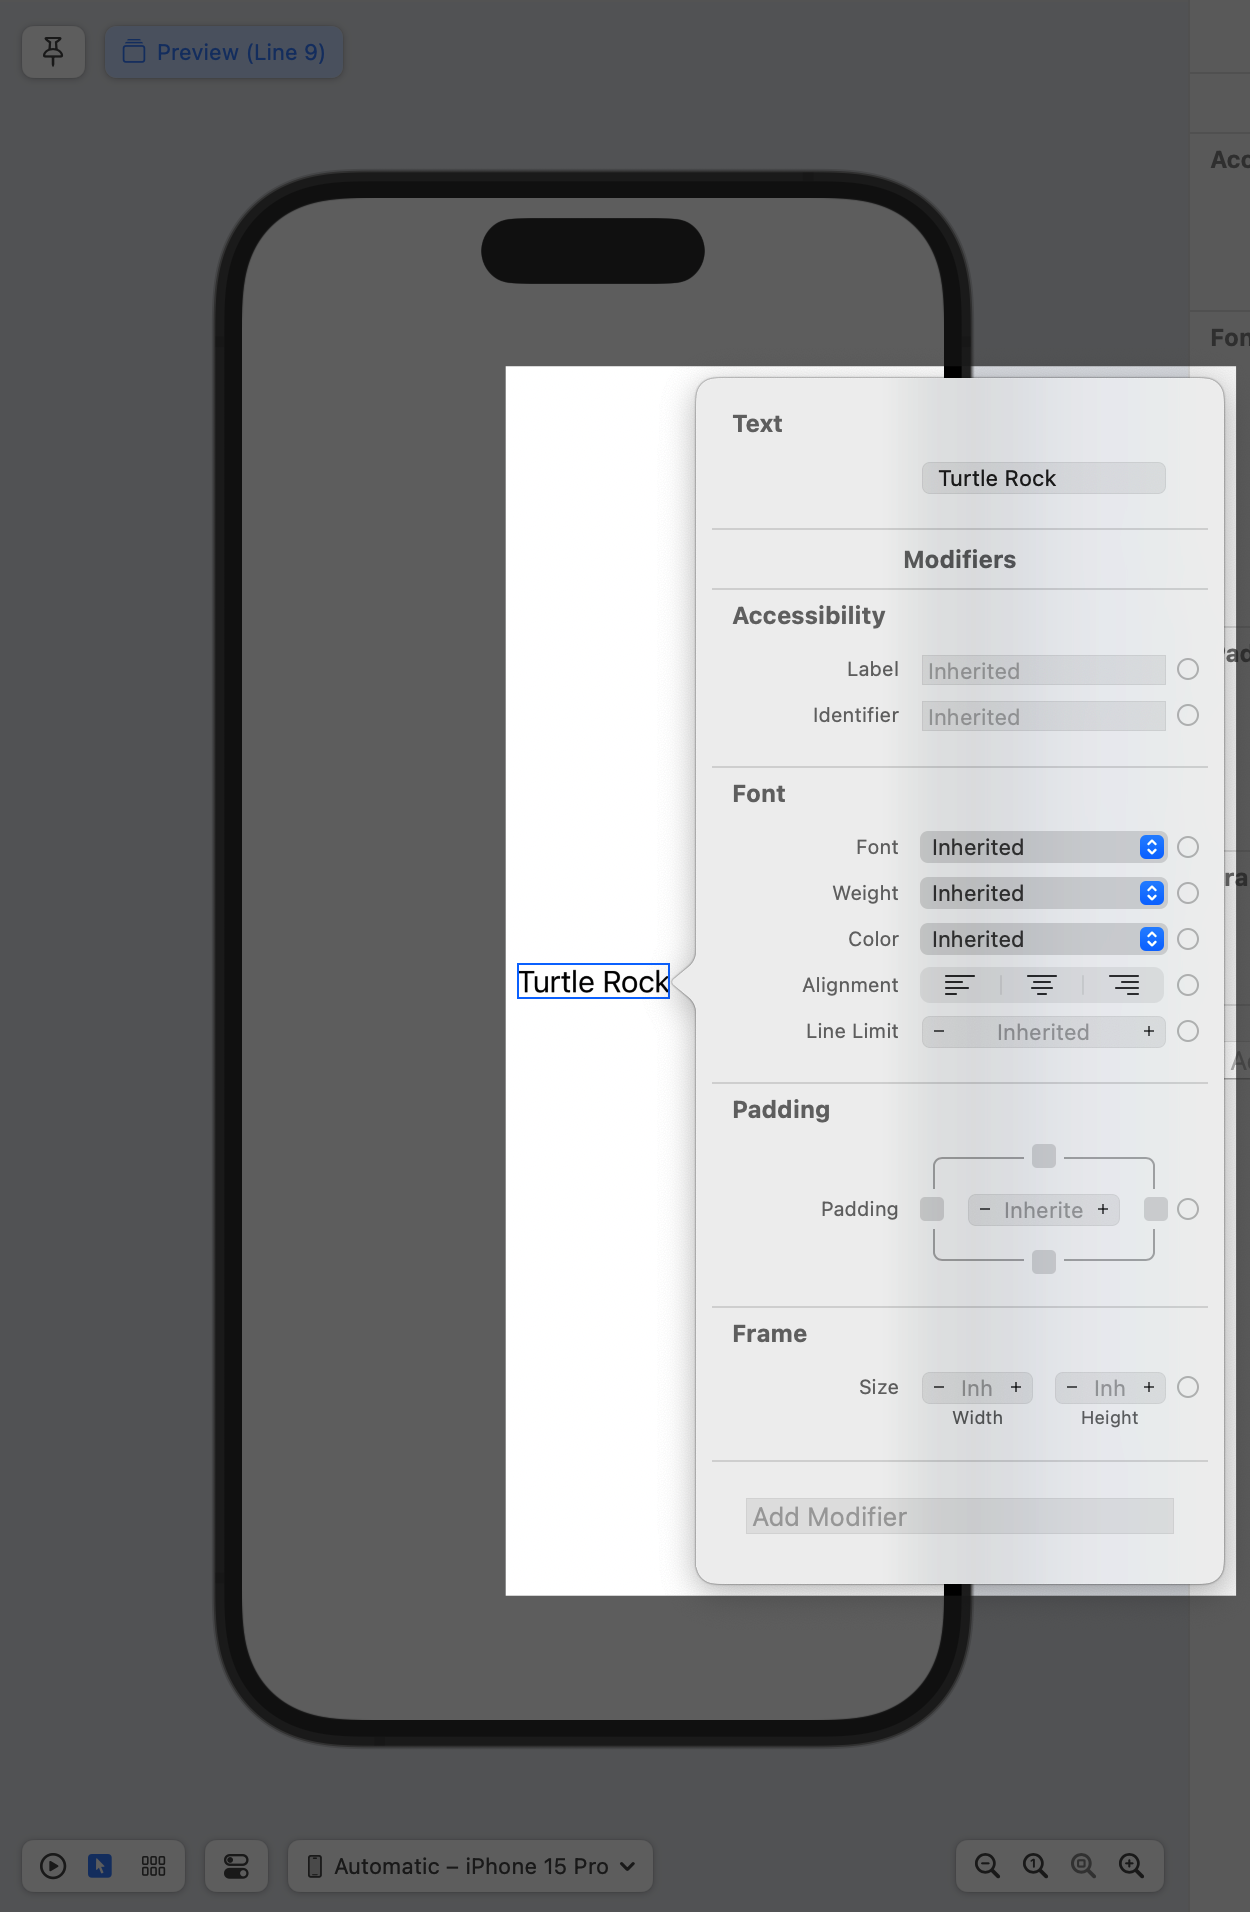
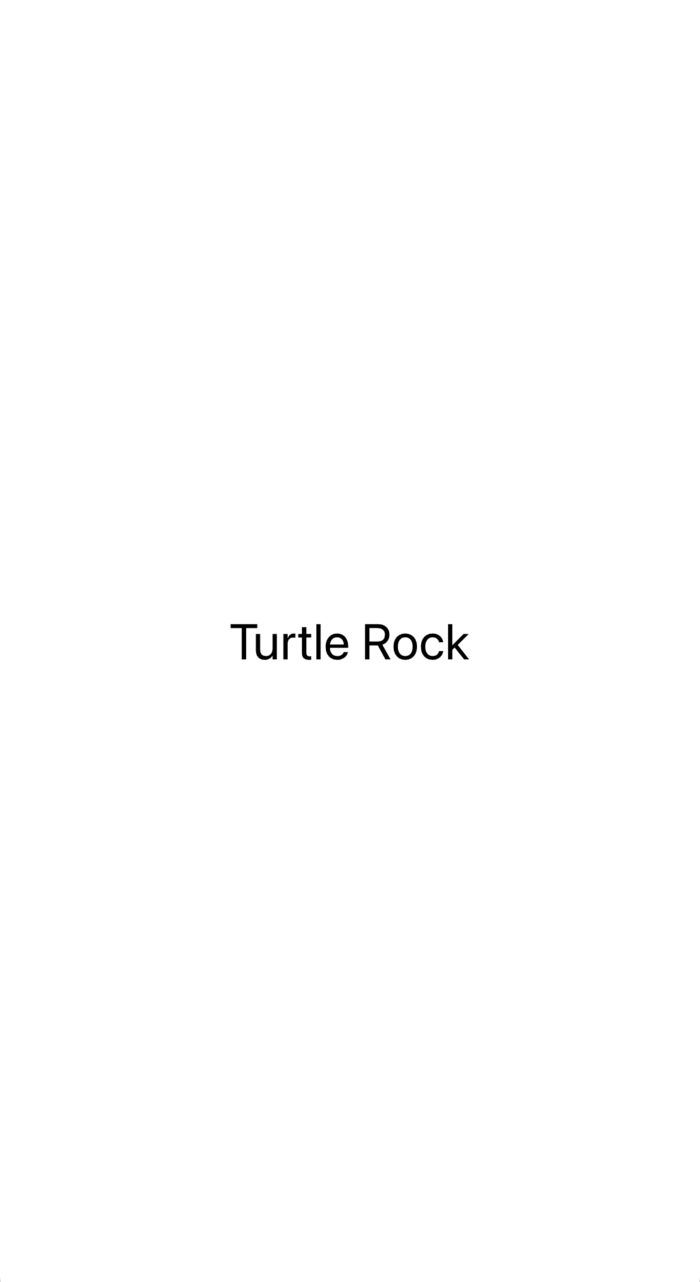
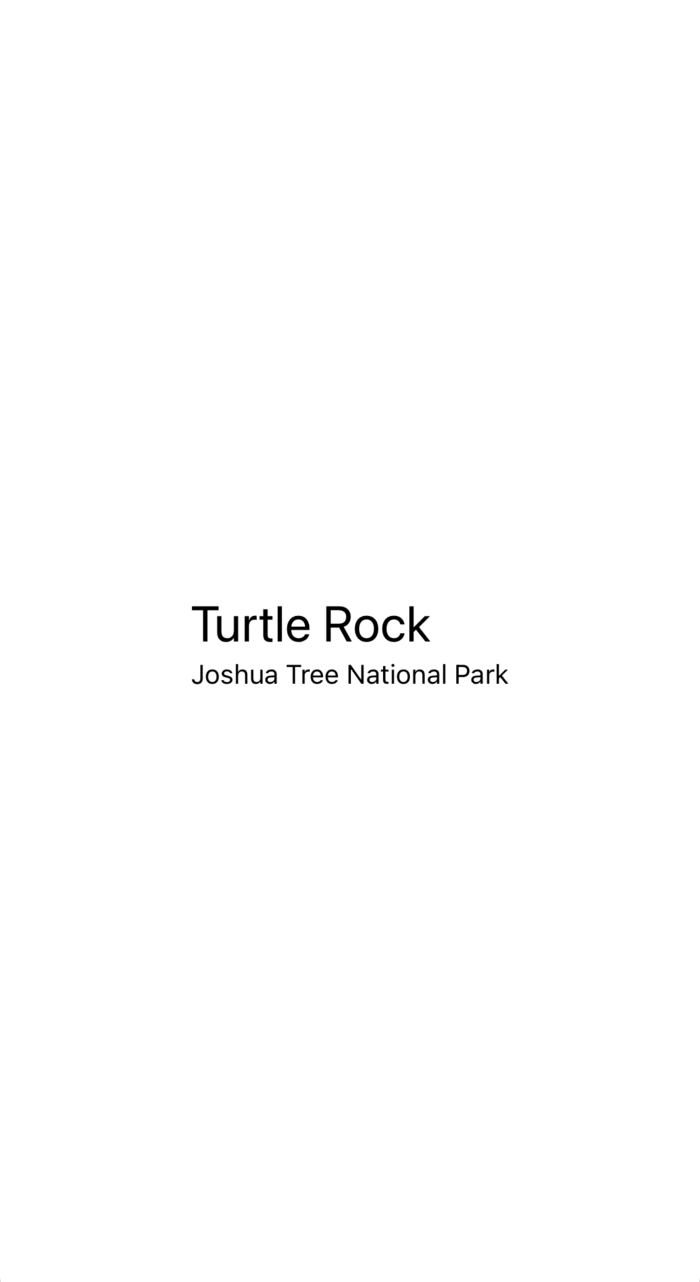
Use the inspector to change the text to “Turtle Rock”, the name of the first landmark you’ll show in your app.
Step 4
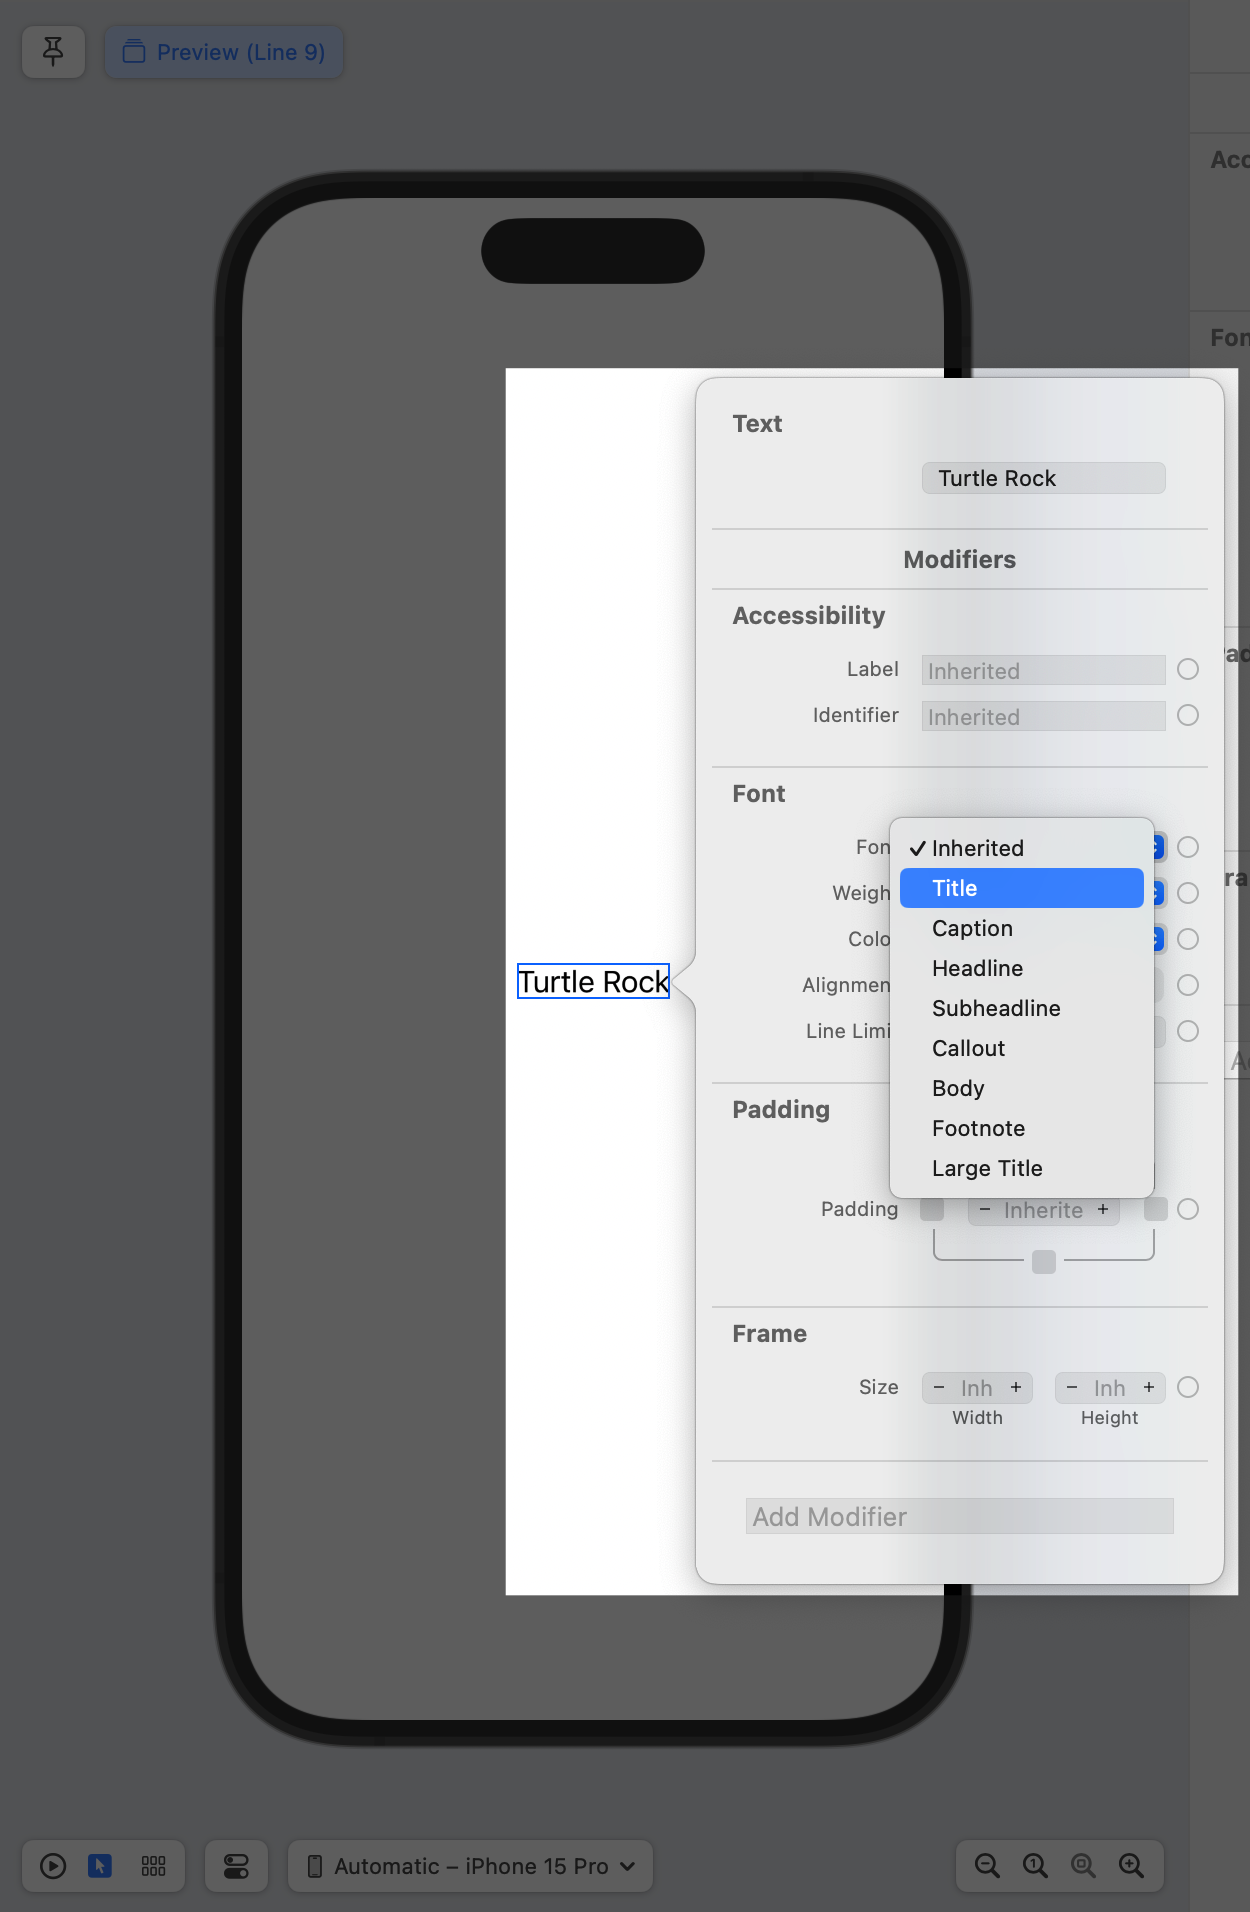
Change the Font modifier to “Title”.
This applies the system font to the text so that it responds correctly to the user’s preferred font sizes and settings.
To customize a SwiftUI view, you call methods called modifiers. Modifiers wrap a view to change its display or other properties. Each modifier returns a new view, so it’s common to chain multiple modifiers, stacked vertically.
Step 5
Edit the code by hand to add the foregroundColor(.green) modifier; this changes the text’s color to green.
1import SwiftUI23struct ContentView: View {4var body: some View {5Text("Turtle Rock")6.font(.title)7.foregroundColor(.green)8}9}1011#Preview {12ContentView()13}
Your code is always the source of truth for the view. When you use the inspector to change or remove a modifier, Xcode updates your code immediately to match.
Step 6
This time, open the inspector by Control-clicking on the Text declaration in the code editor, and then choose “Show SwiftUI Inspector” from the popover. Click the Color pop-up menu and choose Inherited to change the text color to black again.
Step 7
Notice that Xcode updates your code automatically to reflect the change, removing the foregroundColor(.green) modifier.
1import SwiftUI23struct ContentView: View {4var body: some View {5Text("Turtle Rock")6.font(.title)78}9}1011#Preview {12ContentView()13}
Step 8
Set the preview back to Live mode.
Working in Live mode makes it easy to keep track of view behavior as you make edits in source.
Section 3
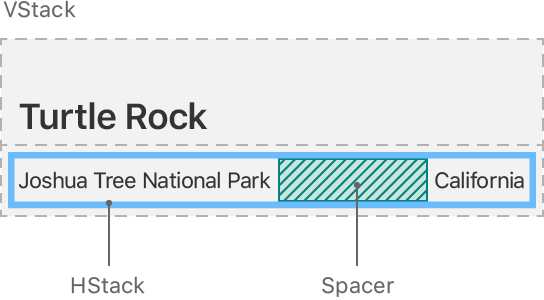
Combine views using stacks
Beyond the title view you created in the previous section, you’ll add text views to contain details about the landmark, such as the name of the park and state it’s in.
When creating a SwiftUI view, you describe its content, layout, and behavior in the view’s body property; however, the body property only returns a single view. You can combine and embed multiple views in stacks, which group views together horizontally, vertically, or back-to-front.
In this section, you’ll use a vertical stack to place the title above a horizontal stack that contains details about the park.
You can use Xcode to embed a view in a container view, open an inspector, or help with other useful changes.
Step 1
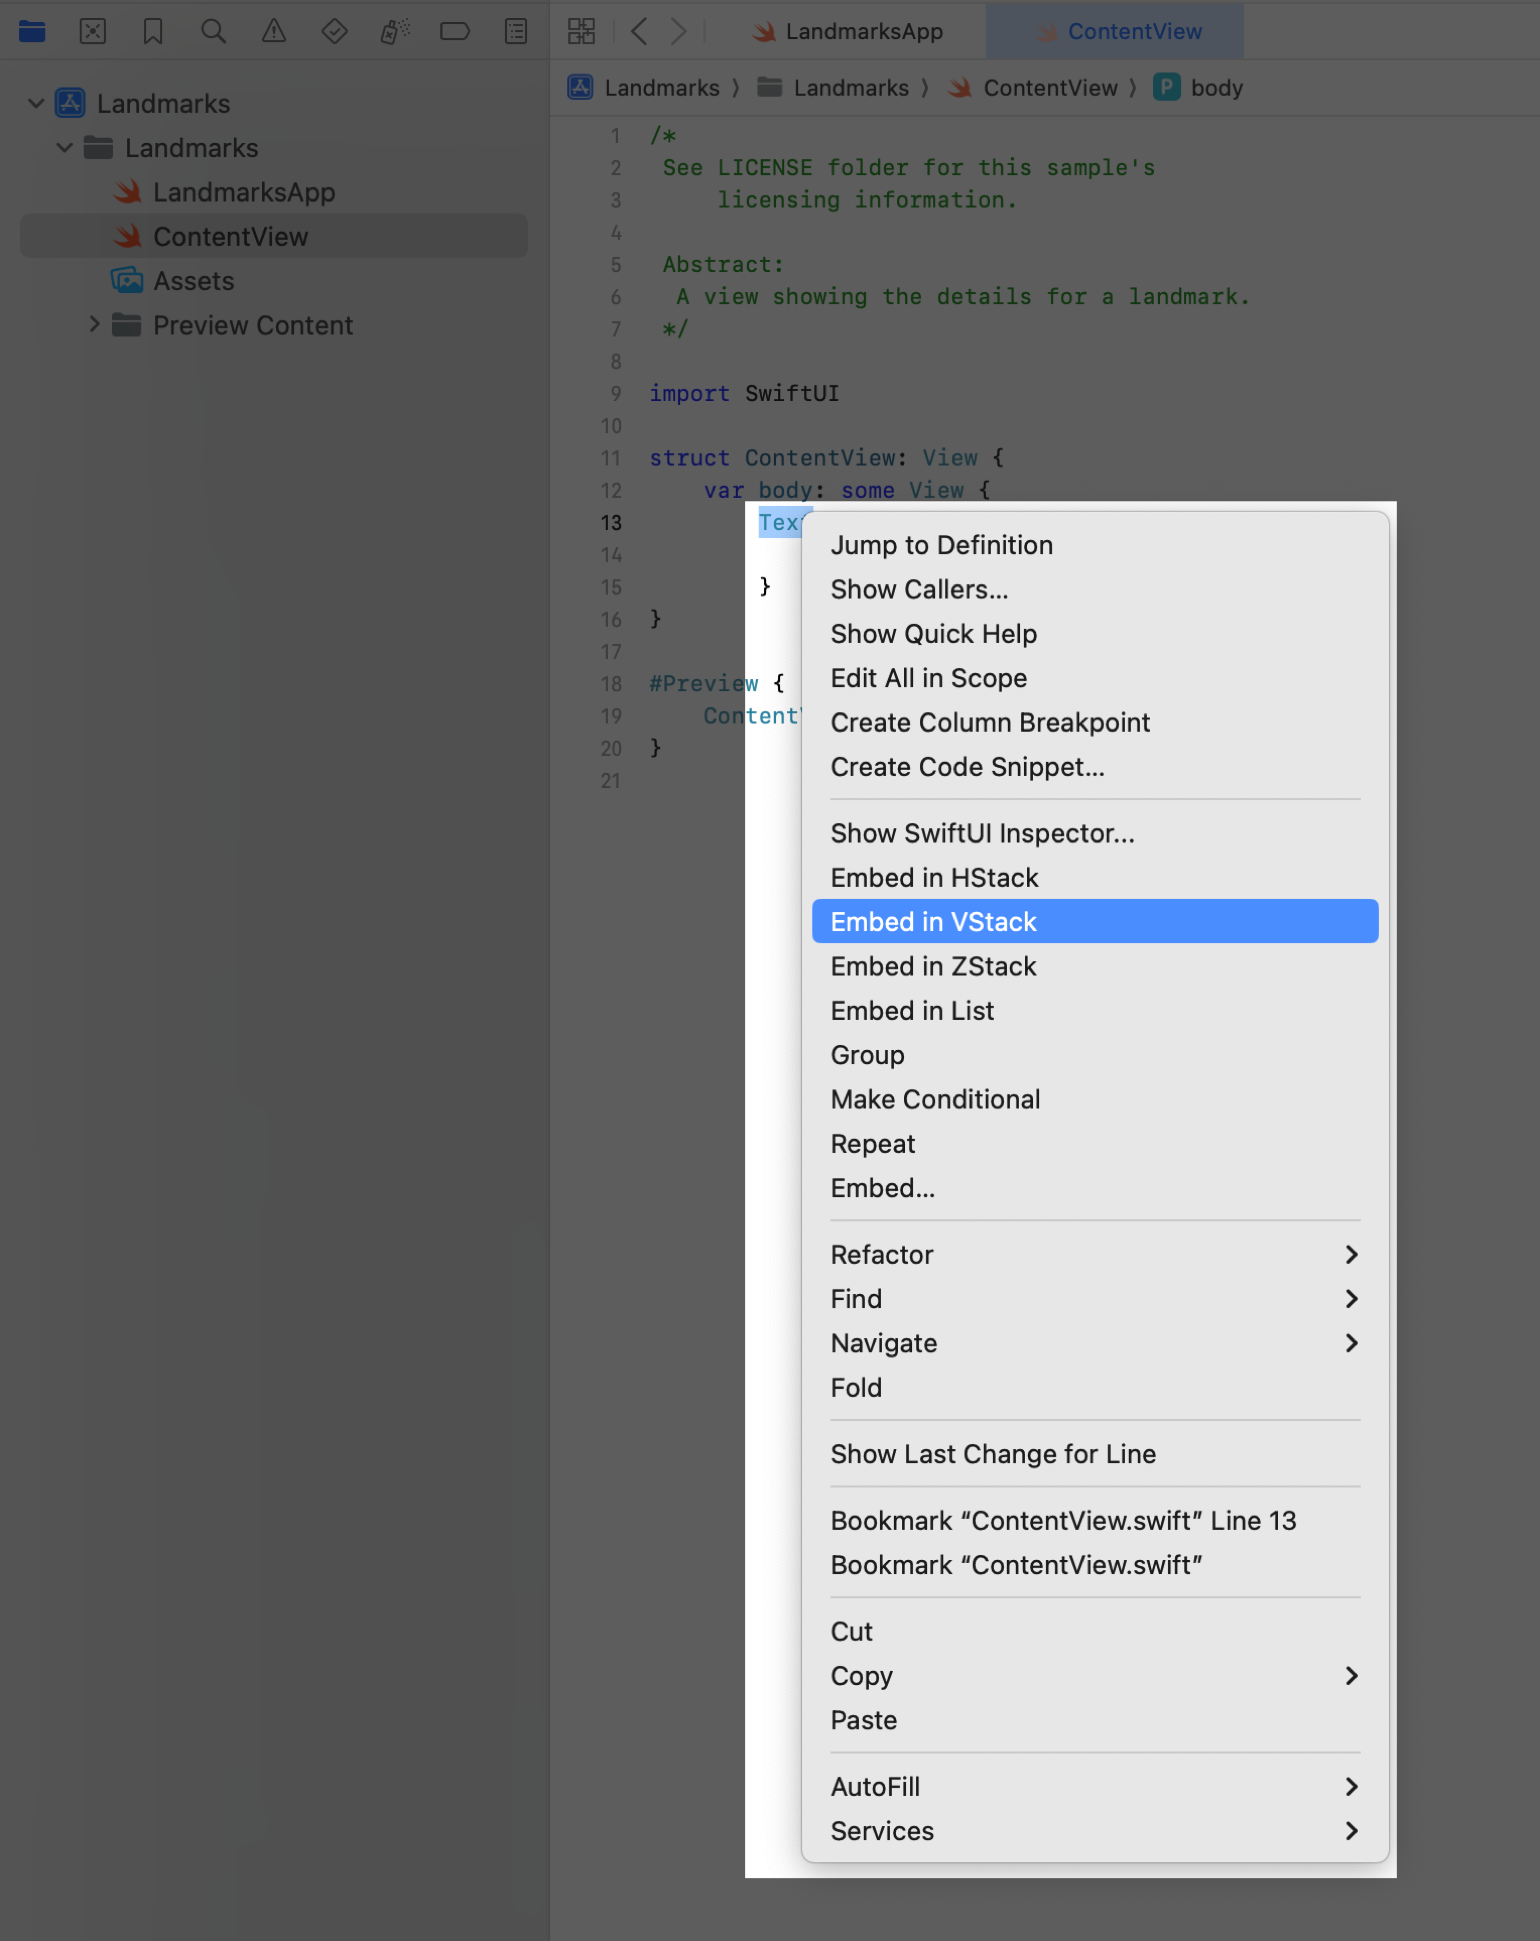
Control-click the text view’s initializer to show a context menu, and then choose “Embed in VStack”.
Next, you’ll add a text view to the stack by dragging a Text view from the library.
Step 2
Open the library by clicking the plus button (+) at the top-right of the Xcode window, and then drag a Text view to the place in your code immediately below the “Turtle Rock” text view.
Step 3
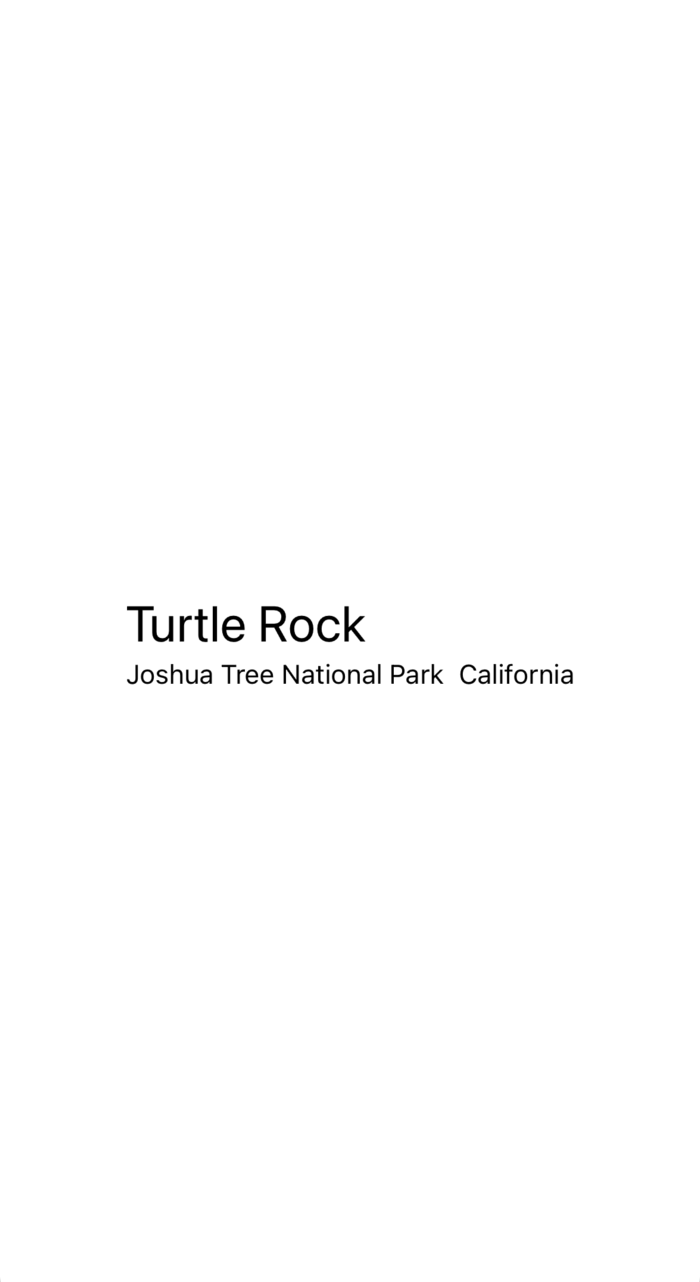
Replace the Text view’s placeholder text with “Joshua Tree National Park”.
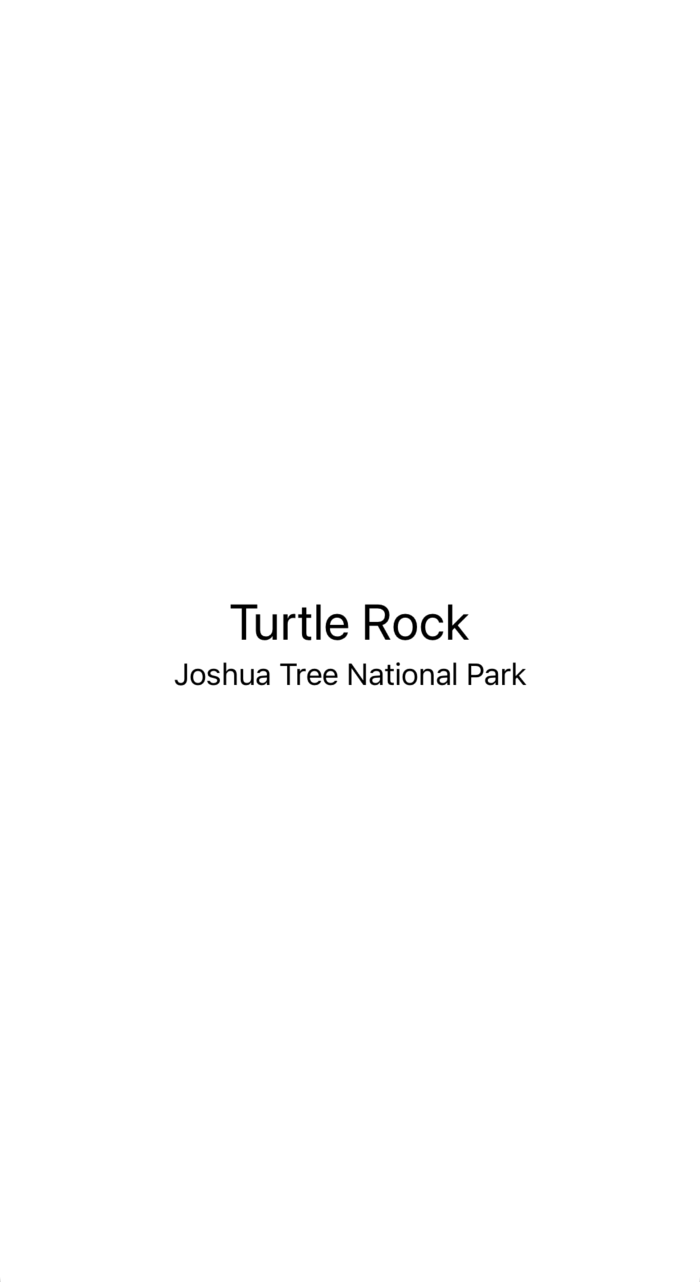
1import SwiftUI23struct ContentView: View {4var body: some View {5VStack {6Text("Turtle Rock")7.font(.title)8Text("Joshua Tree National Park")9}10}11}1213#Preview {14ContentView()15}
Customize the location to match the desired layout.
Step 4
Set the location’s font to subheadline.
1import SwiftUI23struct ContentView: View {4var body: some View {5VStack {6Text("Turtle Rock")7.font(.title)8Text("Joshua Tree National Park")9.font(.subheadline)10}11}12}1314#Preview {15ContentView()16}

Step 5
Edit the VStack initializer to align the views by their leading edges.
By default, stacks center their contents along their axis and provide context-appropriate spacing.
1import SwiftUI23struct ContentView: View {4var body: some View {5VStack(alignment: .leading) {6Text("Turtle Rock")7.font(.title)8Text("Joshua Tree National Park")9.font(.subheadline)10}11}12}1314#Preview {15ContentView()16}
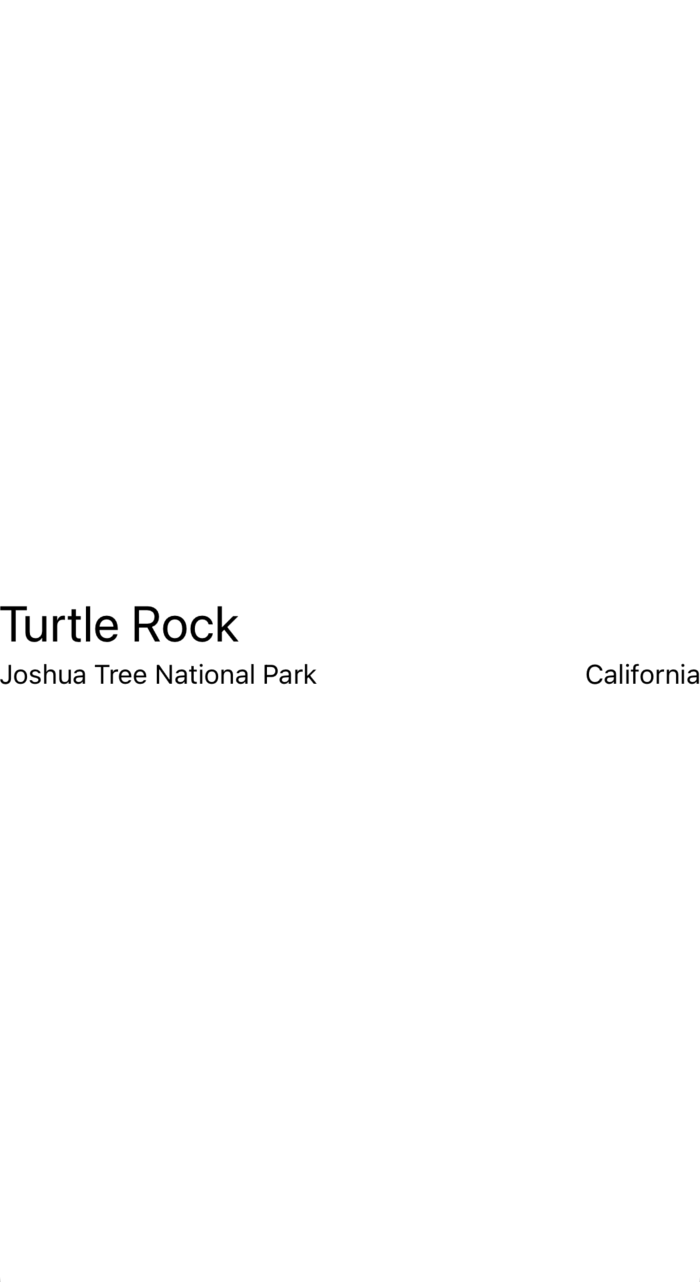
Next, you’ll add another text view to the right of the location, this for the park’s state.
Step 6
Embed the “Joshua Tree National Park” text view in an HStack.
1import SwiftUI23struct ContentView: View {4var body: some View {5VStack(alignment: .leading) {6Text("Turtle Rock")7.font(.title)8HStack {9Text("Joshua Tree National Park")10.font(.subheadline)11}12}13}14}1516#Preview {17ContentView()18}
Step 7
Add a new text view after the location, change the placeholder text to the park’s state, and then set its font to subheadline.
1import SwiftUI23struct ContentView: View {4var body: some View {5VStack(alignment: .leading) {6Text("Turtle Rock")7.font(.title)8HStack {9Text("Joshua Tree National Park")10.font(.subheadline)11Text("California")12.font(.subheadline)13}14}15}16}1718#Preview {19ContentView()20}
Step 8
To direct the layout to use the full width of the device, separate the park and the state by adding a Spacer to the horizontal stack holding the two text views.
A spacer expands to make its containing view use all of the space of its parent view, instead of having its size defined only by its contents.
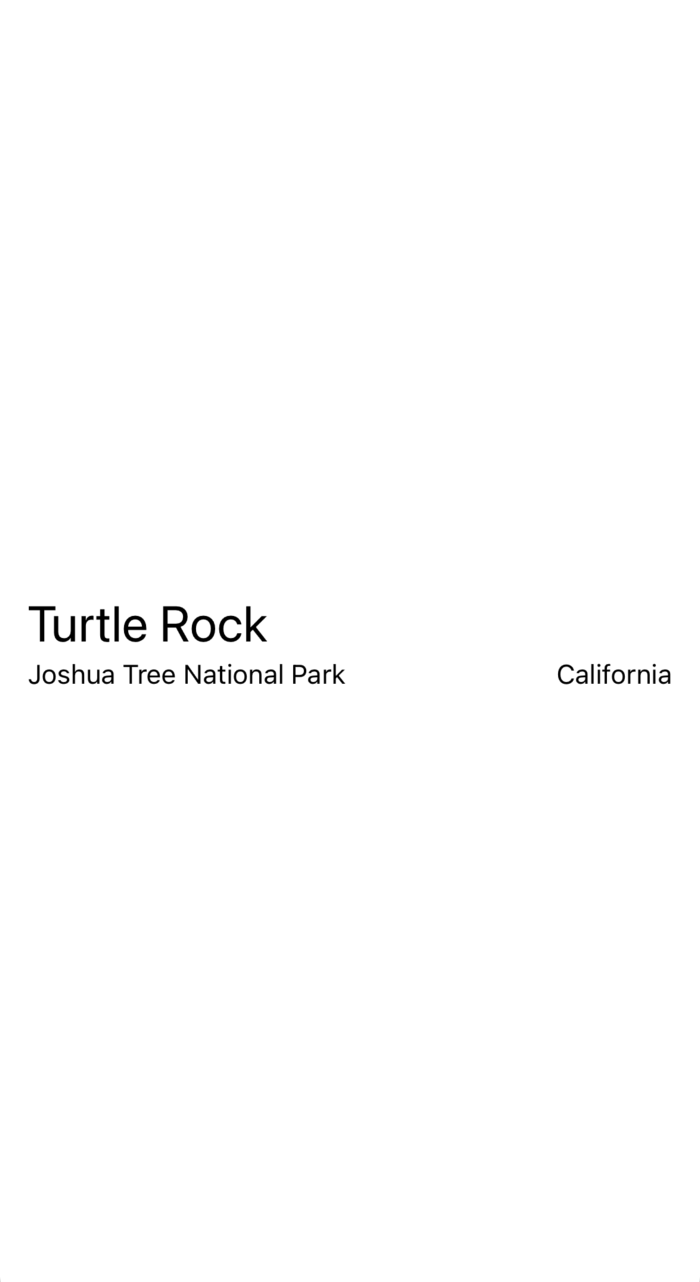
1import SwiftUI23struct ContentView: View {4var body: some View {5VStack(alignment: .leading) {6Text("Turtle Rock")7.font(.title)8HStack {9Text("Joshua Tree National Park")10.font(.subheadline)11Spacer()12Text("California")13.font(.subheadline)14}15}16}17}1819#Preview {20ContentView()21}
Step 9
Finally, use the padding() modifier to give the landmark’s name and details a little more space around their outer edges.
1import SwiftUI23struct ContentView: View {4var body: some View {5VStack(alignment: .leading) {6Text("Turtle Rock")7.font(.title)8HStack {9Text("Joshua Tree National Park")10.font(.subheadline)11Spacer()12Text("California")13.font(.subheadline)14}15}16.padding()17}18}1920#Preview {21ContentView()22}